Blocky Attestation Service Setup
The Blocky Attestation Service (Blocky AS) is available both as a command-line interface (CLI) and as a REST API. The installation and configuration instructions below apply to the Blocky AS CLI. If you want to use the Blocky AS REST API directly, contact us at info@blocky.rocks.
Installation
To use the Blocky AS CLI you need to install its executable, bky-as, and its configuration file, config.toml. You may complete this process using our installation script, or by manually downloading the executable and the configuration file.
Using the installation script
To install the Blocky AS CLI, run the following command:
curl -s https://raw.githubusercontent.com/blocky/attestation-service-cli/refs/tags/v0.1.0-beta.11/install.sh | bashThe installation script will check your system architecture, operating system, and download the appropriate Blocky AS CLI executable as bky-as. If you prefer, you can move bky-as to another location in your $PATH.
The installation script will also download a configuration file called config.toml. The bky-as command will look for it in the current directory, ./configs, $HOME/.config/bky/bky-as or you can specify the location using the --config command line argument to bky-as.
The installation script overwrites config.toml in the current directory. Once you go through the Configuration process to customize config.toml, you may want to move it to a different directory.
Manual installation
To install the Blocky AS CLI manually:
Go to the Blocky Attestation Service v0.1.0-beta.11 release page.
You will see a list of pre-build CLI executables:
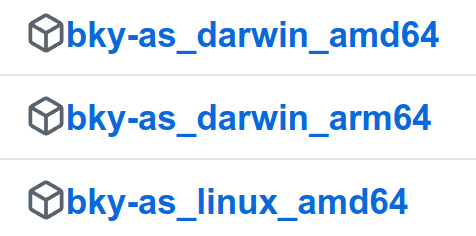
Identify the executable that's compatible with your system, download as
bky-as, place it in your$PATH, and give it executable permissions.After clicking on the latest release, you will also see

Download the
config.tomlfile and place it in the same directory as thebky-asexecutable, in./configs, or in$HOME/.config/bky/bky-as. You can also specify the location of the configuration file using the--configcommand line argument tobky-as.
Testing the installation
To test the installation of bky-as and see available commands, run:
bky-as --helpAdditional Dependencies
Several examples in this documentation rely on the jq command to parse JSON output of bky-as. If you don't have jq installed already, you set it up using your package manager or from the jq website.
Configuration
The starting config.toml uses local-server as the host, which directs bky-as to start a local server that does NOT run in a TEE. As a result, the attestations produced by a local server are not suitable for production use.
To use Blocky AS in production, contact info@blocky.rocks for:
The URL of a production Blocky AS server running inside a TEE. You will need to set it as the
hostvalue inconfig.toml.A developer token for accessing the Blocky AS server. You will need to set it as the
auth_tokenvalue inconfig.toml.A measurement of the source code running on the TEE. You will need to add it to the
acceptable_measurementsvalues inconfig.toml. This setting allows you to define what version of the Blocky AS code you trust. Please consult the Enclave Measurements section for more information.The default
config.tomlincludesacceptable_measurementsentries for attestations created by a Blocky Attestation Service server running on your local machine and for one running in a TEE enclave in debug mode. In production, you may want to disallow these by commenting them out.
After you set these values in config.toml, you'll be able to obtain attestations that anyone can verify without trusting you or Blocky.
Enclave Measurements
The foundation of the Blocky AS security model relies on two axioms:
- Blocky AS service runs inside a TEE
- The TEE runs a specific version of the Blocky AS service
The current version of Blocky AS runs on AWS Nitro Enclaves. You can read more about The Security Design of the AWS Nitro System, including AWS Nitro Enclaves here. Specifically, we rely on the correctness of AWS Nitro Enclaves implementation and on the ability of AWS to retain the control over the private key used by the AWS Nitro Enclaves hardware security module to sign enclave attestations. Future versions of Blocky AS will support multiple TEE hosting options, including AMD SEV and Intel TDX architectures.
An enclave attestation attests not only the application public key, but also the enclave image, which, can be used to represent the source code, build process, and runtime environment of the application.
In the near future, we will make the source code of Blocky AS available for inspection, which will allow you to build your own enclave image and compare its measurement to the one attested by the enclave. For now, we provide the measurement to enter into your config.toml file. code produces the attestations you receive.